Sunday, September 30, 2012

Gradient Manicure Tutorial

One of the most popular manicure trends at the moment is the gradient manicure. This look is much easier to achieve than it you'd think, so here's how to do it!

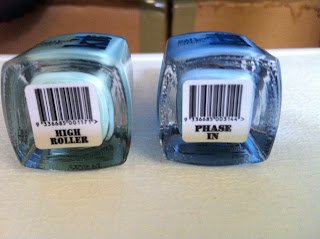
Firstly, choose all the colours you want to use. You can use just two, or as many as you want. I chose to use Kit High Roller as an accent on my ring finger and Kit Phase In on all the others. You'll also need to have a make up sponge, or household sponge at the ready cut into a small piece so you can sponge the colour on to your nail. The best type of sponge I have found to use is a foundation sponge because the surface is the most even. 


Kit Nail Polish available at www.kitcosmetics.com.au


Now, paint your nails all one colour and allow for this to dry. This works best if it's the lightest colour as the others will show up better on top. I used China Glaze Sweet Hook; a gorgeous lavandar creme. Then when this is dry the fun part begins.

I find the best way to do this is to paint your sponge directly with the polish brushes as you'll get an even distribution of colour on the sponge as well as having more control of where the colour goes. Start with your base colour (the colour you've already got on your nails) at the bottom of the sponge, and then paint the other colour/s at the top. Then you sponge directly and gently on the nail. You may need to do this a few times to get the desired opacity of colour, or you can just do it once to make it more subtle. 

After you're happy with the coverage, you can either put on your top coat, or I chose to add a coat of China Glaze Fairy Dust (the best glitter holo top coat) to make my nails a bit more magical. 


xx

Saturday, September 15, 2012

Snow Leopard Manicure

Leopard print. Classic and always in style. And surprisingly easy to recreate on the nail. This time I used OPI My Boyfriend Scales Walls for the base, OPI French Quarter For Your Thoughts as the spots and OPI Black Onyx. Can you tell I love OPI yet?

To recreate this look all you need is three colours, a toothpick and a good top coat. Firstly, paint your base colour and wait a few minutes until it's touch dry. Then use the tip of the other colour to make a few splotches all over the nail, you can get creative with this and either do a couple or a lot depending on the look you want to achieve. Then using the toothpick and the final colour outline the splotches, and to make a few more spots to fill in the gaps. I usually look at either a photo of a leopard or some clothing with leopard print design on it for inspiration. Easy!


xx

Half Moon Manicure Love!

One of my trusty manicures that I do probably too often is the half moon manicure. They're so chic and easy to make subtle or in your face bright. I do them by paining the base lighter colour first and then using a hole punch reinforcer that you buy from any office supply store to create the perfect circular line. Be very careful that the base is dry, as the sticker can pull the colour up. 


The best combinations I think are different textures such as a metallic and a creme, or a bright and a neutral. I also love the orange/pink combination for something a bit more subtle.

xx

Two attempts at Galaxy Nails

Ever since I saw this tutorial on cutepolish YouTube channel I've made two attempts at re-creating this look. I LOVE Galaxy nails, they look so detailed but are relatively easy to recreate as any mistakes can be manipulated to look like a smaller nebular or star. 


The second two images I was playing around with different colour combinations. I used Black Milk Clothing leggings as colour inspirations, and with all designs I finished off THE BEST glitter holographic top coat; China Glaze Fairy Dust. 

xx

Random manis!

Here are a pics of two recent mani's I've done, the first is on a myself, the second is on a friend:

Polish used: OPI Fly (blue), China Glaze Sweet Hook (lavender), OPI Serving Up Sparkle (glitter top coat on ring finger) and black and white nail polish stripers.


Polish used: OPI French Quarter For Your Thoughts (grey), OPI Mod About You (pink), OPI Glitzerland (gold), China Glaze Yellow Polka Dot Bikini (neon yellow), OPI Your Royal Shineness (silver dots on pink aztec nails), China Glaze Fairy Dust (on pink thumb), and white striper for details. 


I'm really into manicures like this at the moment with something different on each finger. 

xx


Thursday, September 6, 2012

Aztec Nails!

This has definitely been the most complicated nail art I have attempted so far, so I thought I'd start off with a bang! The base colour is China Glaze Aquadelic from their 2012 Electropop collection. Photos first, description later:


Again, bad quality I know, I use my iPhone camera. The first thing I did here was apply the base colour. I used three coats so I had good coverage. Then I painted the horizontal stripe using a white striper brush and waited for that to dry. I then used a black striper to paint two lines outside the horizontal white lines to frame the white section, and then free handed the black tips of the nail. After this was relatively dry the next step was to do the diagonal lines over the white area. I made them relatively large so that I could fit a small dot inside the white area. Next I got a dotting tool and used some black polish (OPI black onyx is my go to) and did the small dots inside the triangular area. THEN I used the white striper to do small dashes at the bottom of the nail, and finished off by using the dotting tool to do the white dots on top of my black tips.

I then waited about 10-15 minutes before using a top coat as I didn't want it to smudge which commonly happens when using a lot of different brush strokes and techniques. The best top coat I've ever used is Seche Vite because it dries so quickly to a super shiny finish.

I hope that wasn't too confusing! Plenty more nail art tutorials to come... 


Monday, September 3, 2012

My top 5

I have a lot of nail polish. Like, over 100 bottles a lot. So I don't get the chance to wear my favourite colours as often as I'd like. In order are never fail fave colours:

1. OPI - Lincoln Park After Dark


This has to be OPI's best selling colour right?? Look at the perfection! I'm obsessed with this colour! Blackened purple perfection in two coats. It also has sentimental value as the first bottle of this I bought was in Las Vegas in 2010, and the first time I put it on was whilst I was sitting poolside at Ceaser's Palace drinking a cocktail. So just for a moment everytime I paint this colour on I'm transported back to that pool... Enough said, I love this colour and everyone needs this in their life.


2. China Glaze - For Audrey


Oh, the iconic Tiffany & Co blue... or as close as they can legally get to the trademarked colour. Isn't it beautiful?? Everytime I wear this I feel a little bit fancy. A must have for every collection, the blue is universally flattering.


3. OPI - The Show Must Go On


2 photos were needed to show the amazing duo-chrome of this beauty. It shifts from fuchsia to a fiery orange depending on whether you're in the sunlight or shade. Just magical. I save this one for special occasions as I know it's super expensive now on eBay. 


4. Nicole by OPI - Khloe had a Little Lam Lam


Terrible photo I know, but you get the gist. Dark teal green. Perfect in two coats. It's a universally flattering colour, amazing formula, and not a shade we see all the time. I've got a back up bottle because I know I'll finish this one soon.


5. China Glaze - Splish Splash

Oh God, a terrible photo! I must remember to take photos of the polish I use WITH it's bottle after I finish them! To my credit... I did this in a rush and then went away to the snow for the weekend, so I didn't have the bottle with me, and when I got back my hands were not pretty. 

Anyway, China Glaze Splish Splash is from the 2012 Summer Neon collection. I bought too many of them as I have a thing for China Glaze neons... They just get it right everytime! This is a must have because not only is it NEON bright (I didn't know if my nails or the snow was brighter) but it has gorgeous subtle blue shimmer as well! Love it!

Hope you've enjoyed my current (Sept 2012) top 5. Heaps of nail art to come, stay tuned...

x